How To Repair Torsion Spring On Garage Door Cable?
Repairing a garage door’s torsion spring and replacing the cable are critical maintenance tasks that require attention to detail and strict adherence to safety procedures. These components are integral to the garage door’s functioning and safety.
The torsion spring helps lift and lower the garage door smoothly, while the cable works with the spring to ensure the door operates correctly. Due to the high tension involved in these parts, repairing them can be dangerous. This guide will provide a comprehensive overview of how to safely repair the torsion spring and replace the cable on your garage door.
Basic Information About Torsion Spring

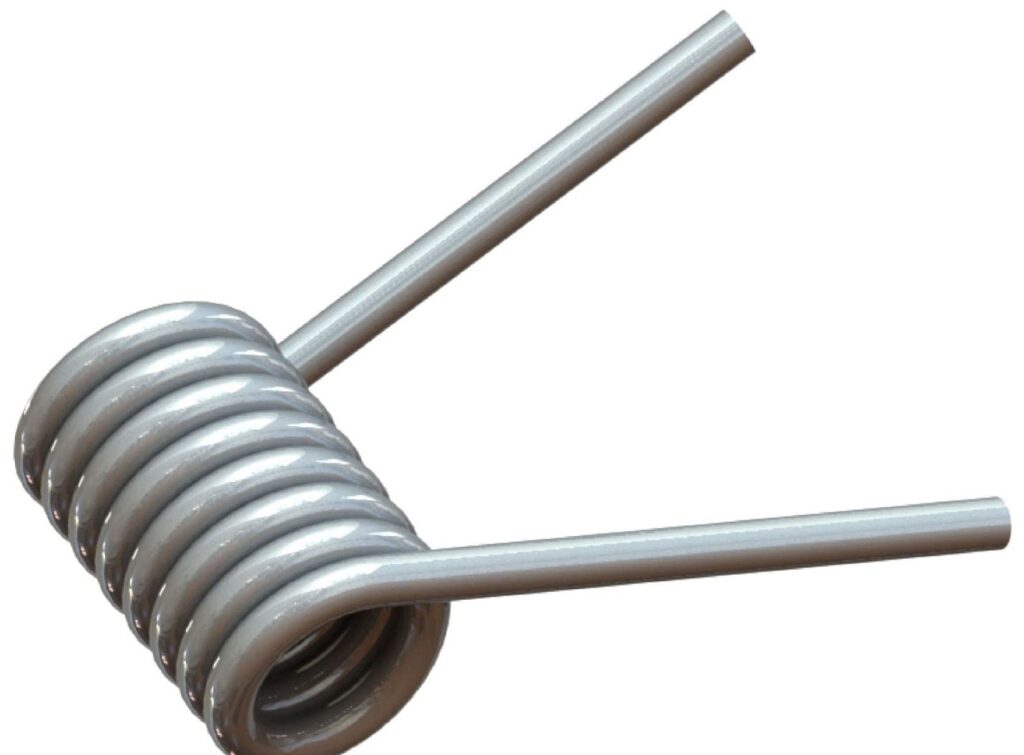
A torsion spring is a type of mechanical spring that works by torsion or twisting; that is, it exerts torque (a rotational force) in the opposite direction when twisted. In the context of a garage door, the torsion spring is crucial for balancing and supporting the door’s weight as it opens and closes.
The torsion spring is typically mounted horizontally above the garage door opening. One end of the spring is secured to a stationary mounting bracket in the center of the door, while the other is attached to a shaft with cable drums at each end.
Cables attached to the bottom corners of the door wrap around these drums. As the garage door is opened, the spring winds up and stores energy. When closing the door, the energy is released, helping to lift the heavy door and reduce the load on the garage door opener.
Torsion springs are calibrated specifically for the weight and size of the garage door they are installed on, ensuring smooth operation and balance throughout the door’s movement. Using a torsion spring system allows for more precise control of the door’s motion, improved safety, longer lifespan, and smoother operation than other spring systems.
Tools and Materials Needed
- Winding Bars: These are sturdy metal rods used to manually wind and unwind the tension on the torsion springs safely. They fit into the holes on the winding cone of the torsion spring.
- Adjustable Wrench: A versatile tool used to loosen and tighten nuts and bolts of various sizes. It’s essential for adjusting the set screws on the torsion spring’s winding cone.
- Socket Wrench: This tool is used with various socket sizes to tighten and loosen bolts quickly, providing more leverage and precision than a standard wrench.
- Vice Grips: Locking pliers that can be clamped onto the garage door tracks to secure the door in place while working on the springs or cables.
- Replacement Torsion Spring: If the current torsion spring is broken or worn out, a new one that matches the size and weight specifications of the door is needed.
- Replacement Cables: These are the steel wires that connect the bottom of the door to the torsion spring system. They should be replaced if frayed or damaged.
- Ladder: Used to reach the torsion springs and mechanism located above the garage door.
- Safety Glasses: Protective eyewear that prevents injuries from flying debris or accidental springs release.
- Gloves: Protects your hands from sharp edges and the friction of handling metal components.
Safety Precautions
Before you start, it’s imperative to take these safety precautions:
- Wear Protective Gear: Always wear safety glasses and gloves.
- Unplug the Garage Door Opener: This prevents the door from being activated accidentally.
- Secure the Door: Use vice grips or clamps on the tracks just above the lowest Garage Door roller to prevent the door from opening while you work.
- Have an Assistant: If possible, have someone help you to hold the ladder and pass tools.
Step-by-Step Guide to Repair Torsion Spring
Step 1: Prepare the Door
- Close the garage door completely.
- Unplug the garage door opener to ensure it cannot be activated.
- Secure the garage door by placing vice grips on the track above one of the rollers to prevent the door from moving.
Step 2: Unwind the Torsion Spring
- Locate the torsion spring above the garage door.
- Insert one of the winding bars into the bottom hole of the winding cone on the spring. Hold the bar firmly.
- Loosen the set screws on the winding cone using an adjustable wrench while holding the winding bar.
- Carefully unwind the spring using the winding bars, lowering the bar down incrementally and inserting the second bar at the top when necessary to continue unwinding safely.
Step 3: Disconnect the Old Spring and Cable
- Once the tension is released, disconnect the spring from the center bracket.
- Remove the cables from the bottom brackets on either side of the door.
Step 4: Install the New Torsion Spring and Cable
- If replacing the spring, attach the new torsion spring to the center bracket.
- Reattach or replace the cables at the bottom bracket.
- Ensure the cables are seated correctly in the drum and that they run straight and are not twisted.
Step 5: Wind the New Torsion Spring
- Securely hold the winding bars and wind the new spring by turning the winding cone. Each turn applies more tension to the spring.
- Follow the manufacturer’s guidelines for the number of turns required for your specific door size and weight.
Step 6: Secure and Test the Installation
- Tighten the set screws on the winding cone once the proper tension is achieved.
- Carefully remove the vice grips from the track.
- Plug in the garage door opener and test the door functionality several times. Adjust the tension if necessary.
Final Checks and Maintenance Tips
- Lubricate the springs and cables with a silicone-based lubricant.
- Check for any loose screws and ensure all fastenings are tight.
- Regularly inspect the garage door components for signs of wear or damage.
Conclusion
Repairing a torsion spring and replacing a cable on a garage door demand precision, the right tools, and a meticulous approach to safety. If you are not completely confident in your ability to perform these repairs safely and effectively, it is strongly recommended to seek the assistance of a professional.
Ensuring that these components are properly maintained can significantly extend the life of your garage door and enhance its safe operation. Regular inspections can identify potential issues before they lead to more significant problems or failures.
The risks associated with improperly installed or damaged torsion springs and cables cannot be overstated, as these can result in serious injury or damage to property.
Adhering to the recommended guidelines and performing routine maintenance can keep your garage door functioning smoothly and safely. Remember, while DIY projects can be satisfying, the complexity and risks associated with garage door repairs often merit professional intervention. Taking this cautious approach ensures your safety and your garage door system’s structural integrity and reliability.


