How to Program Genie Garage Door Opener?
If you’re a new owner, understanding the Genie opener’s software components can simplify your daily routines. Additionally, knowing these components can help maximize the functionality of your opener. The Genie Garage Door Opener is a game changer.
It revolutionizes home automation by providing seamless garage access. It is as easy as touching a button. Homeowners choose it because it’s reliable, popular, and comfortable. Many positive online reviews highlight its durability and user-friendly features.
Before you begin to program Genie garage door opener, it’s crucial to understand its significance. Programming enables you to sync the opener with the remote control. This ensures smooth and safe access to your garage. Regular maintenance and proper programming can extend your opener’s life. In addition, they can save you from potential problems.
Program Genie Garage Door Opener

Understanding Genie Garage Door Opener Parts
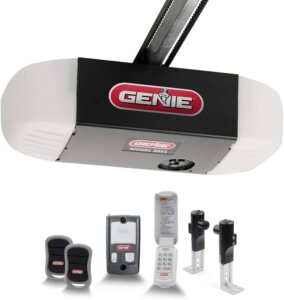
Before programming, familiarize yourself with the motor unit, wall bracket, sensors, and remote control. Knowing each part and function makes troubleshooting smoother.
Genie Garage Door Opener Programming
The process varies by model. You can consult the user manual for detailed instructions on synchronizing the remote control with the opener. This usually involves opening the opener and program buttons, pressing them, and then pressing the remote and button to synchronize them.
Step-by-Step Guide to Program a Genie Garage Door Opener
- Locate the “Learn” Button: Look for the “learn” button on the Genie garage door opener motor unit. It is usually located near the antenna wire or motor housing.
- Clear Previous Programming: Press and hold the “Learn” button until the indicator light beside it blinks or changes color. This action clears any previous programming from the opener.
- Prepare the Genie Garage Door Opener Remote: Hold the Genie Garage Door Opener remote close to the opener. Locate the button you wish to program. It is commonly marked as “Prog” or “Learn”.
- Activate the Programming Mode on the Remote: Press the button on the remote you want to program. Release the button. Do this several times, usually 3-4 times. Keep doing it until you see the indicator light blink.
- Syncing the Remote with the Opener: Within 30 seconds of pressing the button on the remote, return to the Genie Garage Door Opener motor unit. Press the “Learn” button on the motor unit itself. This button is the same one you pressed on the remote for programming.
- Confirm Successful Programming: The motor unit’s indicator light should flash or change. This confirms successful remote programming with the opener.
- Test the Remote: Test the programmed remote by pressing the button you just programmed on the remote. The garage door should respond by opening or closing.
Extending Lifespan and Maintenance Tips:
- Regular Lubrication: Regularly lubricate moving parts like rollers, hinges, and rollers to prevent wear. This will ensure trouble-free operation.
- Routine Inspections: Perform routine inspections of the opener. Inspect its components, including cables, springs, and sensors. Look for signs of wear or damage. A quick fix can help prevent serious problems.
- Avoiding Overuse: Limit excessive door cycles to extend open time and life. Consider adding more security features. You can also install smart systems. These systems will automate opening and closing, reducing the need for manual use.
- Professional Maintenance: Consider hiring a professional for periodic maintenance. Our experts have the knowledge to identify possible issues in advance. This guarantees a prolonged lifespan for your Genie garage door opener.
Mastering the programming of your Genie garage door opener increases convenience. It also ensures the longevity of your opener. To optimize performance and minimize repairs, understand programming techniques and maintenance tips. Remember, DIY maintenance is helpful. However, consulting an expert is invaluable for maximizing the opener’s lifespan.


